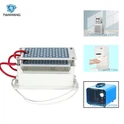
Hey there! As a supplier of ozone purifiers, I often get asked about how to replace the ozone generator in an ozone purifier. It might seem like a daunting task, but with the right guidance, it's actually quite doable. In this blog, I'll walk you through the process step by step.
First off, let's talk about why you might want to replace the ozone generator. Over time, the ozone generator in your purifier can wear out. Factors like usage frequency, the environment it's in, and the quality of the generator itself can all affect its lifespan. When the generator starts to malfunction, you might notice a decrease in the amount of ozone produced, or perhaps an unusual smell or noise coming from the purifier. That's a sign it's time for a replacement.
Before you start the replacement process, you need to gather the right tools. You'll typically need a screwdriver, which can be either a Phillips or flat - head depending on the type of screws your purifier uses. It's also a good idea to have a pair of gloves to protect your hands from any sharp edges inside the purifier.


Now, let's choose the right ozone generator for your purifier. There are different types and sizes available. For example, we have the 10g ozone generator Cleaner Ozonizer Odor Eliminator, which is great for medium - sized rooms. If you have a smaller space, the 5g Ozone generator might be a better fit. And for larger areas or spaces that need more intense air sterilization, the 20g Portable Ozone Generator Air Sterilizer is a top choice.
Once you've got the right generator and tools, it's time to get to work. Start by unplugging the ozone purifier from the power source. This is super important to avoid any electrical shock. Then, place the purifier on a stable surface. Look for the access panel of the purifier. Usually, it's on the back or side of the unit. Use your screwdriver to remove the screws that hold the panel in place. Be careful not to lose the screws.
After removing the panel, you'll be able to see the old ozone generator. It's usually a small, box - like component. There will be wires connected to it. Before disconnecting the wires, take a photo or make a note of how they're attached. This will make it easier to connect the new generator later. To disconnect the wires, gently pull them off the terminals on the generator.
Now, carefully remove the old generator from its mounting. It might be held in place by brackets or clips. Just loosen them and take out the generator. Set the old generator aside.
Next, take your new ozone generator. Make sure it's the right model for your purifier. Place it in the same position where the old generator was. Align it properly with the mounting brackets or clips. Once it's in place, secure it using the brackets or clips.
Now, it's time to connect the wires. Refer to the photo or note you made earlier. Connect the wires to the terminals on the new generator. Make sure the connections are tight. You don't want any loose wires that could cause problems later.
After connecting the wires, put the access panel back on. Use the screwdriver to re - attach the screws. Tighten them just enough so that the panel is secure, but don't over - tighten them as it could damage the panel or the purifier.
Once you've put the panel back on, plug the purifier back into the power source. Turn on the purifier and check if it's working properly. You should start to smell the characteristic smell of ozone, which indicates that the generator is producing ozone. If you notice any issues, like strange noises or if the purifier doesn't turn on, double - check the connections and make sure everything is installed correctly.
It's also important to follow the maintenance instructions for the new ozone generator. Regular cleaning and proper usage will help extend its lifespan. You should clean the generator according to the manufacturer's recommendations. This usually involves removing any dust or debris that might accumulate on it.
If you're still not confident about replacing the ozone generator on your own, don't worry. You can always reach out to us. As an ozone purifier supplier, we have a team of experts who can provide you with more detailed guidance or even offer installation services.
We understand that different customers have different needs. Whether you're a homeowner looking to improve the air quality in your living room or a business owner in need of a large - scale ozone purification system, we have a wide range of products to meet your requirements. If you're interested in purchasing an ozone generator or need more information about our products, feel free to contact us. We're always happy to have a chat about your needs and help you find the best solution.
In conclusion, replacing the ozone generator in an ozone purifier isn't as difficult as it might seem. With the right tools, the correct replacement part, and a bit of patience, you can do it yourself. And if you run into any problems, we're here to support you. So, don't hesitate to get in touch if you need anything. Let's make your air cleaner and fresher together!
References:
- General knowledge on ozone purifiers and their components.
- Manufacturer's manuals for ozone generators and purifiers.