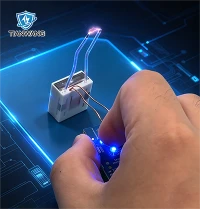
An electric fence can look normal but still deliver too little voltage at the far end. In many cases, the problem is not the electric fence energizer itself. Poor grounding, vegetation, damaged insulators, weak connections, battery problems and excessive fence load can all reduce performance.
For farms, ranches, livestock operations and wildlife-control systems, identifying the real source of the problem before replacing the energizer can save time and unnecessary equipment costs.
This guide covers the most common electric fence problems, how to test them, and what to check before replacing an electric fence energizer.
Safety note: Electric fence energizers produce high-voltage pulses. Use a dedicated electric fence tester, insulated tools and follow the manufacturer's safety instructions. Disconnect power during repairs and storms where required.
Key Takeaways
- A low-voltage fence is not automatically a failed energizer.
- Test the energizer with the fence disconnected before buying a replacement.
- Poor grounding is one of the most overlooked causes of weak electric fence performance.
- Vegetation, damaged insulators and corroded connections often cause voltage drop.
- Long or extended fences may require a larger, better-matched energizer.
Table of Contents
- How Does an Electric Fence System Work?
- Common Electric Fence Problems: Quick Diagnosis
- Electric Fence Not Working? Start with Energizer Troubleshooting
- Electric Fence Low Voltage: Causes and Fixes
- Electric Fence Voltage Drop: Why the Fence Loses Voltage at the End
- Electric Fence Grounding Problems
- Electric Fence Vegetation Problems
- Damaged Insulators
- Loose or Corroded Connections
- Dry, Rocky or Frozen Ground
- Weak Battery or Solar Power Supply
- Electric Fence Energizer Problems: Too Small for the Fence
- Electric Fence Troubleshooting Procedure
- How to Test an Electric Fence Energizer
- How to Test Electric Fence Grounding
- How to Find a Short in an Electric Fence
- Equipment for Electric Fence Troubleshooting
- When Should You Replace the Electric Fence Energizer?
- How to Choose the Right Electric Fence Energizer
- FAQ: Electric Fence Troubleshooting
A low-voltage electric fence is not always an energizer failure. Check grounding, vegetation and connections first.

How Does an Electric Fence System Work?
An electric fence system normally consists of four basic parts:
- Electric fence energizer
- Electrified fence wire
- Grounding system
- Insulators and connecting wires
The energizer generates short high-voltage pulses and sends them through the fence wire. When an animal touches the live wire while also having a connection to ground, the electrical circuit is completed and the animal receives a brief shock.
A properly designed grounding system is therefore just as important as the energizer itself. Industry troubleshooting guides commonly identify grounding and connections as major causes of electric fence failure.
A good energizer cannot compensate for a poor grounding system.
Common Electric Fence Problems: Quick Diagnosis
| Problem | Common Cause | What to Check |
|---|---|---|
| Electric fence not working | Power supply, battery or internal fault | Test energizer with fence disconnected |
| Electric fence low voltage | Poor grounding, vegetation or weak connections | Measure voltage at several points |
| Electric fence loses voltage at the end | High resistance or excessive fence length | Test voltage section by section |
| Fence stops working after rain | Faulty insulation or leakage points | Inspect wires, insulators and vegetation |
| Fence works poorly in dry weather | Poor soil conductivity | Check grounding system |
| Electric fence vegetation problems | Grass, weeds or branches touching wire | Clear vegetation from live wires |
| Fence works near energizer but not far away | High-resistance connections or under-sized system | Test progressively along fence |
| Battery-powered fence becomes weak | Low battery or poor charging | Check battery voltage and charging system |
| Intermittent fence performance | Loose or corroded connection | Inspect terminals and wire joins |
| New or longer fence performs poorly | Energizer is not matched to total fence load | Recalculate fence requirements |
The key point is that a low-voltage fence should not automatically be treated as an energizer failure.
10 most common electric fence problems and what to check first.

Electric Fence Not Working? Start with Electric Fence Energizer Troubleshooting
This is the first problem to check.
Before inspecting the fence line, disconnect the energizer from the fence and test the output directly at the energizer terminals with an electric fence tester.
If there is no output, check:
- Is the energizer switched on?
- Is the AC power supply available?
- Is the battery fully charged?
- Are the battery terminals clean?
- Are the input cables securely connected?
- Is there a blown fuse or other power-supply problem?
Professional Troubleshooting Tip
Do not immediately assume that the energizer is defective.
First determine whether the energizer produces its normal pulse when isolated from the fence. If it does, the fault is more likely to be somewhere in the fence or grounding system.
For suitable testers and energizers, see our electric fence tester and AC electric fence energizer options.
How to test an electric fence energizer step by step.
Electric Fence Low Voltage: Causes and Fixes
One of the most common questions from livestock-farm operators is:
Why is my electric fence voltage low?
A low reading may be caused by several different factors:
- Poor grounding
- Heavy vegetation
- Broken or weak connections
- Corroded wire
- Damaged insulators
- Accidental contact with grounded objects
- Excessively long fence lines
- An energizer that is too small for the system
- Weak battery or unstable power supply
The correct approach is to measure the fence voltage at multiple locations instead of testing only near the energizer.
How to Fix an Electric Fence with Low Voltage
- Test voltage at the energizer and at several points along the fence.
- Check the grounding system.
- Clear grass, weeds and branches from the live wire.
- Inspect and repair weak or corroded connections.
- Replace cracked or contaminated insulators.
- Confirm the energizer matches the total fence load.
- Re-test the system after repairs.
Why is my electric fence voltage low? Causes and fixes.
Electric Fence Voltage Drop: Why the Fence Loses Voltage at the End
This is especially important for large farms and long livestock fences.
A fence may show strong voltage near the energizer but significantly lower voltage farther away. This usually indicates a problem somewhere between the energizer and the point where the voltage drops.
Typical Causes of Electric Fence Voltage Drop
- High-resistance connections
- Rusted wire
- Poor-quality splices
- Broken conductors
- Undersized connecting wire
- Vegetation loading the fence
- Fence sections that are too long for the selected energizer
Recommended Testing Method
Start at the energizer.
Measure the fence voltage.
Then move farther along the fence and test again.
Continue until you find the point where the voltage drops significantly.
The problem is usually located in the section immediately before that drop. This is much more efficient than inspecting the entire fence randomly.
For larger systems, a fence fault finder can help locate the direction and position of a fault.
Test section by section. The fault is usually just before the voltage drop.
Electric Fence Grounding Problems: The Hidden Cause of Weak Shocks
Grounding is one of the most overlooked parts of an electric fence system.
The fence energizer may produce a strong pulse, but if the grounding system cannot provide a suitable return path, the fence may deliver poor performance.
Common Grounding Problems
- Too few ground rods
- Ground rods installed incorrectly
- Corroded ground connections
- Poor connection between rods
- Ground rods installed in unsuitable soil
- Dry, sandy, rocky or frozen ground
- Mixing metals that accelerate corrosion
How to Improve Grounding
Check:
- Ground rod condition
- Ground wire connections
- Ground rod spacing
- Soil conditions
- Ground voltage under test conditions
Do not judge the performance of an energizer without checking its grounding system.
See related grounding accessories: electric fence grounding kit.
Electric fence grounding problems and how to improve grounding.
Electric Fence Vegetation Problems: How to Stop Leakage
Grass, weeds, bushes and branches touching the live fence wire can create electrical leakage.
Vegetation problems are especially common during the growing season.
The result can be:
- Lower fence voltage
- Increased electrical load
- Reduced performance at the far end
- More frequent energizer stress
What Should You Inspect?
Walk the entire fence line and check for:
- Grass touching the lower wire
- Bushes growing through the fence
- Tree branches contacting wires
- Fallen vegetation
- Wet plant material resting on the fence
Vegetation control should be part of routine fence maintenance rather than something done only after a failure occurs.
Vegetation causes electric fence voltage loss.
Damaged Insulators Can Create Hidden Fence Faults
Insulators separate the high-voltage fence wire from posts and other conductive structures.
A cracked, broken, contaminated or incorrectly installed insulator can allow leakage to the post or ground.
This problem can be difficult to find because the fence may still show some voltage.
Check for:
- Cracked insulators
- Broken plastic components
- Insulators touching metal posts
- Loose mounting points
- Contamination or moisture around insulation points
After isolating the section responsible for the voltage drop, inspect faulty insulators carefully.
Damaged insulators can create hidden faults.
Loose or Corroded Connections Reduce Fence Performance
A fence can look correctly installed while still having high-resistance connections.
Common problem areas include:
- Wire splices
- Gate connections
- Corner connections
- Underground cables
- Energizer terminals
- Ground-wire connections
Professional Inspection Checklist
Look for:
- Rust
- Corrosion
- Loose clamps
- Broken strands
- Poorly joined conductors
- Different metals that may accelerate corrosion
A connection that looks acceptable visually may still produce a significant voltage drop when the system is under load.
Loose or corroded connections reduce fence performance.
Dry, Rocky or Frozen Ground Can Affect Fence Performance
Many electric fence systems rely on the soil to complete the electrical circuit. This means soil conditions matter.
Performance may change when the ground becomes:
- Very dry
- Sandy
- Rocky
- Frozen
- Poorly conductive
What Can Be Done?
Depending on the fence design and local conditions:
- Improve the grounding system
- Add or reposition ground rods
- Use a suitable ground-return configuration
- Improve ground connections
- Select an energizer and fence design appropriate for local soil conditions
This is one reason why the same energizer may perform differently on two farms with different soil conditions.
Dry, rocky or frozen soil can reduce grounding performance.
Weak Battery or Solar Power Supply
Battery and solar-powered electric fence energizers are widely used for remote farms and pasture fencing.
When fence performance gradually becomes weaker, check the power source before replacing the energizer.
Battery-Powered Systems
Check:
- Battery charge level
- Battery age
- Battery terminals
- Cable connections
- Charging system
- Power-saving functions
Solar-Powered Systems
Check:
- Solar panel condition
- Panel orientation
- Dust or dirt on the panel
- Battery condition
- Charging performance
- Shading from trees or buildings
A weak input power supply can result in reduced energizer performance even when the energizer electronics are functioning correctly.
Explore: battery electric fence energizer and solar electric fence energizer.
Battery and solar electric fence power check.

Electric Fence Energizer Problems: When the Energizer Is Too Small for the Fence
Sometimes the fence itself is the problem.
When a customer extends an existing fence, adds more fence wires or changes the application, the original energizer may no longer be appropriately matched to the system.
A larger fence can introduce:
- Greater total wire length
- More electrical leakage
- More vegetation contact
- More connection points
- Greater grounding requirements
Important Purchasing Point
The advertised fence length should not be considered separately from the actual installation conditions.
When selecting an electric fence energizer, professional buyers should consider:
- Total fence length
- Number of electrified wires
- Animal type
- Vegetation level
- Soil conditions
- Fence construction
- Power source
- Required output energy
- Expected environmental conditions
A properly matched energizer is more important than simply choosing the model with the highest advertised voltage.
Choose the right electric fence energizer by actual installation conditions.
Electric Fence Troubleshooting Procedure
When an electric fence is not performing correctly, follow this sequence.
Step 1 - Test the Energizer
Disconnect the fence and test the energizer output directly.
Step 2 - Check the Power Source
Inspect AC power, battery condition or solar charging performance.
Step 3 - Check the Grounding System
Inspect ground rods, ground wire and connections.
Step 4 - Test the Fence Near the Energizer
Determine whether the pulse reaches the fence correctly.
Step 5 - Test Farther Along the Fence
Continue measuring the voltage at different points.
Step 6 - Locate the Voltage Drop
Identify the section where performance decreases.
Step 7 - Inspect That Section
Look for vegetation, broken wires, damaged insulators, poor connections or accidental grounding.
Step 8 - Re-Test After Repairs
Measure the system again from the energizer to the end of the fence.
This systematic process is consistent with established troubleshooting procedures from major electric-fence manufacturers.
8-step electric fence troubleshooting procedure.
How to Test an Electric Fence Energizer
- Turn off or disconnect the energizer from the fence.
- Use a dedicated electric fence tester.
- Test the output at the energizer terminals.
- Check the power source: AC, battery or solar.
- Inspect fuses, switches, terminals and cables.
- If the energizer produces normal output when isolated, inspect the fence and grounding system.
- If there is no output with correct input power, the energizer or power supply may be faulty.
How to Test Electric Fence Grounding
- Inspect ground rods for corrosion or damage.
- Check ground wire connections.
- Confirm ground rods are spaced correctly.
- Assess soil moisture, type and conductivity.
- Measure ground voltage under load if possible.
- Add or reposition ground rods if performance is poor.
- Consider a ground-return design for dry, sandy, rocky or frozen conditions.
How to Find a Short in an Electric Fence
- Use a fence fault finder or voltage tester.
- Start at the energizer and measure voltage.
- Move progressively along the fence.
- Identify the point where voltage drops sharply.
- Inspect the section immediately before the drop.
- Check vegetation, damaged insulators, wires touching posts or ground, gate connections, corners and underground cables.
- Isolate and repair the faulty section.
- Re-test the entire fence.
What Equipment Should You Use to Troubleshoot an Electric Fence?
A proper electric fence tester or volt meter should be part of routine maintenance.
Do not rely on ordinary household electrical test equipment for fence diagnosis.
A professional troubleshooting kit may include:
- Electric fence volt meter
- Fence fault finder
- Grounding tester
- Insulated connection tools
- Replacement insulators
- Suitable high-voltage insulated cable
For larger commercial fence systems, a fault finder that measures both voltage and current can help identify the direction and location of a fault.
Electric fence troubleshooting equipment kit.
When Should You Replace the Electric Fence Energizer?
An energizer should not be replaced simply because the fence voltage is low.
First eliminate:
- Poor grounding
- Vegetation
- Broken wires
- Damaged insulators
- Corroded connections
- Weak batteries
- Incorrect installation
- Excessive fence length
The energizer becomes a stronger suspect when it produces insufficient output even when disconnected from the fence and supplied with the correct input power.
This simple distinction can prevent unnecessary replacement of a functioning energizer.
Replace the energizer or repair the fence?
How to Choose the Right Electric Fence Energizer
For a new installation or replacement project, professional buyers should provide the following information before selecting an energizer:
1. Fence Length
Examples:
- 5 km
- 10 km
- 20 km
- 40 km
2. Animal Type
Examples:
- Cattle
- Sheep
- Goats
- Horses
- Pigs
- Deer
- Wildlife
3. Power Source
- AC mains
- 12V battery
- Solar + battery
4. Fence Environment
- Dry pasture
- Green pasture
- Forest edge
- Crop field
- Remote ranch
5. Fence Construction
Number of wires, wire type, grounding system and expected vegetation load should all be considered.
A professional energizer supplier should be able to recommend the appropriate configuration instead of simply quoting a model based on fence length alone.
FAQ: Electric Fence Troubleshooting
Why is my electric fence not working?
Possible causes include power-supply problems, a faulty energizer, poor grounding, broken wires, damaged insulators, vegetation or poor connections. Start by disconnecting the fence and testing the energizer output directly.
Why is my electric fence voltage low?
Low voltage can result from poor grounding, vegetation, high-resistance connections, damaged insulation, weak power supply or an energizer that is not properly matched to the fence.
Why does my electric fence work near the charger but not at the end?
This often indicates voltage loss somewhere along the fence caused by high-resistance connections, damaged wire, vegetation or an overloaded fence system. Test the fence at multiple points to locate the voltage drop.
Does dry soil affect an electric fence?
Yes. Dry, sandy, rocky or frozen soil can reduce grounding performance and may require additional grounding measures or a suitable ground-return design.
Can vegetation cause an electric fence to lose power?
Yes. Grass, weeds and branches touching the live wire can create electrical leakage and reduce fence voltage.
How do I know whether the energizer or fence is the problem?
Disconnect the energizer from the fence and test its output directly. If the energizer performs normally without the fence connected, inspect the grounding system and fence line.
Can a longer fence require a different energizer?
Yes. Extending a fence increases the electrical load and may require an energizer with different output capability depending on the fence design and environmental conditions.
How to test an electric fence energizer?
Disconnect the energizer from the fence, use a dedicated fence tester at the terminals, check the power source, and compare the output with the manufacturer's specification.
How to test electric fence grounding?
Inspect ground rods, ground wires and connections. Check rod spacing and soil conditions. Measure ground voltage under load and add or reposition rods if needed.
How to find a short in an electric fence?
Use a fault finder, test voltage progressively along the fence, locate the sharp voltage drop, and inspect the section immediately before the drop for vegetation, damaged insulators, broken wires or accidental grounding.
Final Checklist Before Replacing Your Energizer
Before purchasing a new electric fence energizer, check:
Power → Energizer Output → Grounding → Fence Voltage → Connections → Insulators → Vegetation → Fence Length → Environmental Conditions
If the energizer passes the standalone output test but the fence does not maintain adequate voltage, replacing the energizer may not solve the underlying problem.
A properly designed electric fence is a complete system. The energizer, grounding, conductors, insulators and fence layout all work together.

Need Help Selecting an Electric Fence Energizer?
For farms, ranches, livestock fencing and remote applications, the correct energizer depends on more than the advertised fence distance.
When requesting a quotation, provide:
- Required fence length
- Animal type
- Power source
- Number of fence wires
- Soil conditions
- Vegetation conditions
- Intended application
- Required customization or OEM specifications
A professional electric fence energizer manufacturer can then recommend a suitable configuration for the actual application.
Jiangsu Tianwang Solar Technology Co., Ltd. provides electric fence energizers and high-voltage pulse solutions for livestock containment, agricultural applications and other fencing systems, with customized OEM/ODM options available. The company's current electric-fence product range includes AC-, battery- and solar-powered solutions.
AC, battery and solar electric fence energizer solutions with OEM/ODM options.